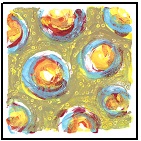
Exploring Gel Printing
In-Person – Wednesday 1:10 pm – 2:50 pm
Jan. 15, 22, 29 and Feb. 5, 12 
This is an opportunity to explore gel or “gelli” printing. The gel plate is a soft plate, so it is much easier to make mono-prints and experiment with it. Participants learn the basics of how to pull a print. Participants should look at the videos of gel printing available (although many are extremely aspirational.)
Materials required – Please bring printing supplies to the very first class:
- paper to print on (origami, tissue paper, printer paper, rice paper, magazines)
- a gel plate
- acrylic paints (these will NOT easily wash out of clothing)
- rollers/brayers for paint (not made of foam)
- baby oil (MUST rub oil on the plate after cleaning it)
- things to print (botanicals, anything with a texture that you don’t mind getting paint on such as string, wire, doilies, mesh onion bag, textured rolling pin, paper clips, old jewelry)
- newspaper
- junk paper to layer prints
- paint, brayers, paper, stuff to print and printing plate
If students do not have materials, they will not be able to make prints.
Materials can be ordered from Amazon, other online sellers or at an art store. Things to print can be scrounged and purchased.
- Week 1: Demonstration of the basic process—working with botanicals— “Positive and Negative” space and designs
- Week 2: Creating a landscape using gel prints—Color Idea—ROYGBIV—layering printing on a print to make rich textures and color worlds—tissue-coated tissue demonstration
- Week 3: Creating a cityscape using gel prints—Color idea — Value
- Week 4: Making a person using gel prints—Color idea —Mode of appearance, opalescent, nacreous
- Week 5: Making a flower or a flower in a base using gel prints
Louise Flax earned a PhD in Art Education. She has taught art and photography in Norwalk public schools for 38 years. She loves making and teaching art.


